Beginner shooters rarely repeat a mistake for a mysterious reason. They repeat what feels natural, what they saw once on a screen, or what worked when they were strong enough to muscle the ball to the rim. In our work with coaches, parents, and players, the same habits show up again and again: feet turned the wrong way, a guide hand that pushes, a release that changes under pressure, and a landing that looks stiff instead of balanced.
The good news is that beginner shooting technique is very teachable. Better still, fixing form and preventing injuries can happen in the same practice session. You do not need a complicated program. You need a clear picture of what to correct, a handful of simple drills, and enough quality repetitions to make the new habit feel normal.
Why the Same Shooting Mistakes Keep Showing Up
Young players often copy the result of a shot instead of the process. They see a player rise for a jump shot and try to recreate the release, but they skip the base: foot alignment, balanced hips, a straight shooting line, and a landing that can absorb force. When the base is missing, the body finds a shortcut. The elbow flares. The guide hand pushes. The wrist flicks late. The shot may go in during warm-ups, but it rarely holds up when the player is tired, moving, or under pressure.
That is also where injury risk creeps in. A player who shoots off-balance may land on one foot, lock the knees, or drift sideways. A player who relies on the shoulder and wrist may tighten the upper body and lose rhythm. None of these habits automatically cause an injury, but they add stress and reduce control. For beginners, the goal is not to imitate a professional player's jump shot. It is to build a repeatable, comfortable motion that supports good decisions and healthy movement.
Common Mistakes in Beginner Shooting Technique
Most beginner shooting problems fall into a small number of categories. The table below gives a quick reference, and the sections that follow explain how to correct each one without overwhelming the player.
Beginner shooting mistakes, visible signs, and simple corrections.
| Common mistake |
What it looks like |
Simple correction |
| Feet and shoulders out of line |
Player twists before release or misses left and right |
Line up the shooting foot and shoulder with the rim |
| Loading from the arms |
Ball is thrown rather than shot; elbow drops early |
Dip into the legs and finish tall |
| Elbow out and guide hand pushing |
Ball sits on the palm or thumb; release looks two-handed |
Keep the elbow under the ball; let the guide hand rest |
| No follow-through |
Wrist stays stiff or the hand is yanked down |
Hold the release until the ball reaches the rim |
| Rushed rhythm |
Player speeds up when a defender nears |
Use the same dip and rise on every shot |
| Stiff landing |
Player lands on straight legs or one foot |
Bend the knees and land under the hips |
Feet, Shoulders, and Balance
Start with the feet. For most beginners, the shooting-side foot should be slightly ahead, with the toes pointed toward the basket or just slightly turned. The shoulders should be square enough that the shooting elbow can move under the ball without the chest twisting. A simple line drill works: place the player on a line that runs to the basket, shoot form shots from close range, and check that the shooting foot, knee, elbow, and eye are all working along that line. If the player twists, reduce range and slow the shot down.
Balance is the next checkpoint. The player should feel weight through the middle of the feet, not on the heels or the toes. Knees stay bent but not collapsed. Hips sit under the shoulders. This is the position that lets a beginner use the legs to shoot instead of throwing with the arms. It is also the position that makes a soft landing more likely.
Elbow, Guide Hand, and Release
A common beginner mistake is letting the ball rest on the palm or the tip of the thumb. That grip forces the wrist to work from an awkward angle. The ball should sit on the finger pads with a small pocket of space between the palm and the ball. The shooting elbow should be under the ball, not flared out to the side. The guide hand supports the ball from the side; it does not push it toward the rim.
To check the guide hand, have the player shoot one-handed form shots from three to five feet. The guide hand starts on the ball and then lifts away just before release. If the ball wobbles or the player cannot reach the rim, move closer. A one-hand wall shooting drill is also useful: the player stands close to a wall, shoots into the wall with one hand, and holds the finish. The wall gives immediate feedback on the shooting line and wrist position.
Follow-Through and Rhythm
The follow-through is not a pose. It is the natural end of a shot. The wrist should flex toward the rim, and the shooting hand should hold that position until the ball reaches the basket. Beginners often yank the hand down early because they want to see the result. A simple "hold for three" rule helps: hold the finish for a count of three after every form shot. This builds patience and makes the release easier to repeat.
Rhythm is the other piece. Many young players use a different dip, a different pause, and a different release speed on every shot. A useful drill is the Mikan drill for rhythm and touch, followed by form shooting at close range. The player should use the same dip and rise on every repetition, even when tired. If rhythm falls apart, reduce the number of shots and reset.
How to Fix Beginner Shooting Form Without Overcoaching
Beginners do not need ten corrections at once. They need one or two cues and a lot of short, focused reps. A good session might include five minutes of form shooting from three feet, five minutes of one-hand wall shooting, and five minutes of guide-hand and follow-through checks. Keep the player close to the basket. Make the target small. Ask for a soft finish rather than a fast release.
Use this simple progression:
- Line drill: check feet, knees, and shooting line without a ball.
- Form shooting from three feet: one hand, then two hands, with a held follow-through.
- Guide-hand thumb check: shoot close-range shots and confirm the guide hand is not pushing.
- Hold for three: catch, shoot, and hold the finish until the ball hits the rim.
- Mikan drill: build rhythm, touch, and balance around the basket.
Short, accurate reps beat long, sloppy ones. If the player misses three form shots in a row, move closer and slow down. If the player makes five in a row with a balanced finish, the drill is working. This is also a good time to let a player use a youth training program that keeps volume age-appropriate and focused on fundamentals.
Injury Prevention Starts Before the First Shot
Shooting injuries in young players are rarely caused by one shot. They build from repeated stress, poor landing habits, and too much volume without recovery. A beginner who practices for hours with stiff legs and a narrow base is asking the knees and ankles to absorb more force than they need to. The fix is not fear. It is better preparation and smarter practice design.
Begin with a warm-up that raises body temperature and prepares the lower body: easy jogging, skipping, leg swings, hip openers, ankle rocks, and bodyweight squats. Add a few landing drills. Have the player jump straight up, land softly with bent knees, and hold the landing for two seconds. Then add a small forward jump and a lateral jump. The cue is "quiet feet and soft knees." This helps the player connect balance to shooting and landing.
During shooting practice, watch for signs of fatigue: the elbow drops, the guide hand pushes, the player lands on one foot, or the follow-through disappears. Those are coaching cues and recovery cues. Reduce the drill, shorten the session, or switch to free throws and form shooting. Shoes should fit well, the court should be clean and dry, and the player should use a ball size that matches their age and hand strength. A smaller ball can help a young beginner keep the shooting hand under the ball instead of forcing a full-size ball with two hands.
Keep volume reasonable, too. A beginner does not need hundreds of three-point shots. Close-range form shots, free throws, and short catch-and-shoot reps build better habits and reduce repetitive stress. If a player reports pain, stop and seek appropriate medical advice. A coach can teach technique, but a medical professional should evaluate persistent pain.
Using Repeatable Reps Without Building Bad Habits
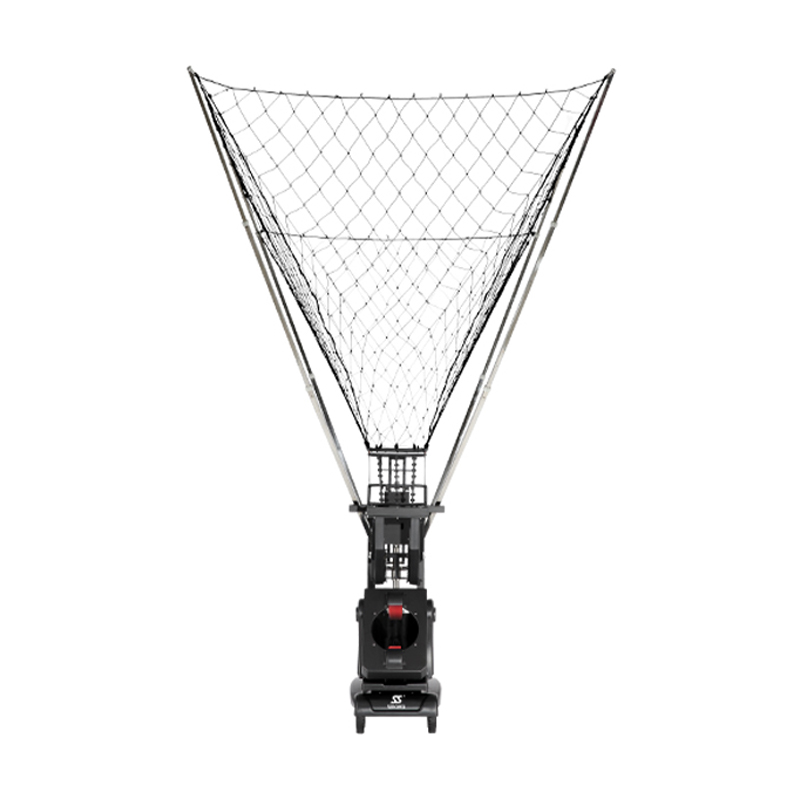
Repeatable reps are powerful, but only when they are accurate. A shooting machine can help a beginner get consistent passes at the same speed and location, which makes it easier to focus on footwork, balance, and release. The key is to set the machine for a manageable pace and a comfortable catch point. Do not chase speed. Use the machine for short blocks of form shooting, then step away and shoot with a partner or coach so the player learns to adjust to different passes.
 K2101 Basketball Serving Machine for Form ShootingAdjustable speed, frequency, angle, and spin delivery support repeatable catch-and-shoot form work, with remote control and wheels for easy court repositioning.View Product →
For players who are ready for more structured reps, a machine with multilevel speed, angle, and spin control can simulate different catch situations without turning practice into a guessing game. A programmable model can also help coaches create repeatable drill patterns for close-range form work, free-throw preparation, and controlled movement shots. The goal is always the same: quality first, quantity second.
 K2101A App-Controlled Basketball Trainer for Multi-Point DrillsMulti-point drill configurations, spin and random delivery, plus app and remote control help coaches create structured, repeatable shooting sessions with adjustable pace.View Product →
More advanced precision machines can place passes into specific spots, which is useful for older beginners who are learning to square up from different angles. Even then, keep the session simple. One or two focus cues are enough. If the player cannot hold a balanced finish, the drill is too fast or too far from the basket.
 K3 Precision Basketball Training Machine with 60-Position TargetingSpin delivery and 60 selectable horizontal positions support specific court-zone shooting drills, with app/remote control and continuous delivery without retrieval for focused repetitions.View Product →
If you are planning a team or school session, our frequently asked questions page is a good place to check practical details before you build a rotation.
Building a Shot That Holds Up
Beginner shooting technique improves when players understand the why behind the correction. Feet and shoulders create the line. Legs create the power. The elbow and guide hand keep the ball stable. The follow-through confirms the release. A soft landing protects the body and makes the next shot easier to balance.
None of this requires a perfect jump shot or a high-flying highlight. It requires patience, short focused drills, and a coach who knows when to stop. Fix one mistake at a time, keep the player close to the basket, and treat injury prevention as part of shooting practice rather than a separate lecture. That approach builds confidence, cleaner form, and a habit that can last far beyond the beginner stage.



 Español
 عربى